

How to add, remove and change Digital Signatures in Word files
Nosotros all know the purpose of a signature is to validate the authenticity and validity of a certificate. As we move from paper to reckoner, for almost every task, it becomes important to find a substitute for a signature. And that is exactly what a digital signature is. Today in this post, we will see how to add, remove and edit signatures in Discussion, Excel, PowerPoint files on Windows PC. The procedure is similar but in this post, we volition talk bout Microsoft Part Word.
Add together, remove & modify signatures in Word files
A digital signature is an encrypted electronic postage stamp that assures that information in the digital document is from the signer. Information technology likewise ensures that the data has not been contradistinct during the transition.
Before creating a digital signature, you need to have a signing certificate. When you transport a digitally signed document, you also send your certificate and a public primal. This acts as an assurance that the document was non contradistinct during the transition. The certificate is usually valid for a year, though information technology depends on the issuing authority. To acquire more nearly getting a digital ID, you could check the document here.
This is a guide for working with digital signatures on Part programs such as Give-and-take, Excel, and PowerPoint. For Outlook, you could cheque this guide on calculation a digital electronic mail signature in Outlook.
Create a signature line in Discussion

- Bespeak your cursor wherever you wish to create the digital signature line on your document.
- Among the tabs on the summit, click on the Insert tab.
- Click on the pointer on the Signature Line list in the Text group. Select Microsoft Role Signature Line. This opens the Signature Setup dialogue box.
- You lot would find fields for the following details – signers total proper name, the title of the signature, signers email ID and instructions to the signer. The only field y'all need to make full is to requite instructions to the signer. This creates a signature line in the certificate, which needs to be filled past the signer.
Signing with the digital signature in Word
- Right-click on the signature line in the document and click on Sign.
- You can select an image of your written signature past clicking on the select epitome and browsing information technology.
- In case you lot are a tablet user, you could as well sign using the touchpad after clicking on the inking choice next to the X.
The mark for a digital signature is added at the bottom.
Remove the digital signature in Word
Just right-click on the signature line and click on Remove Signature.
Add invisible digital signatures in Word
Invisible signatures protect the authenticity of a certificate. However, information technology makes the document read only unless the signer makes the necessary changes.
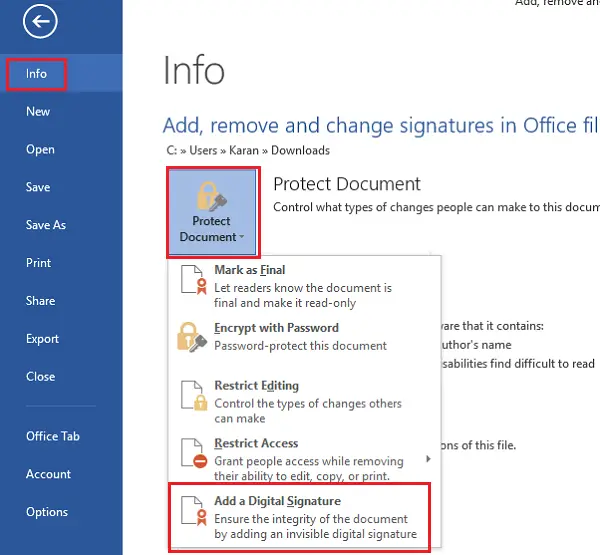
- Click on the File tab, and so on Info and then select Protect Document (for MS Word)/Worksheet (for MS Excel)/ Presentation (for MS PowerPoint).
- Select the option to Add a Digital Signature from the list.
- Fill in the dialogue box and save the settings.
Remove invisible digital signatures in Give-and-take
- Click on the File tab, then Info and so View Signatures.
- Click on the arrow next to the signature name and select Remove from the options.
Hope this helps!
TIP: These posts will evidence yous how to add a digital signature in Excel, PowerPoint, and Outlook.


Source: https://www.thewindowsclub.com/add-remove-and-change-signatures-office-files
Posted by: arnoldforling.blogspot.com
0 Response to "How to add, remove and change Digital Signatures in Word files"
Post a Comment